Cleaving Copper C4 Bumps
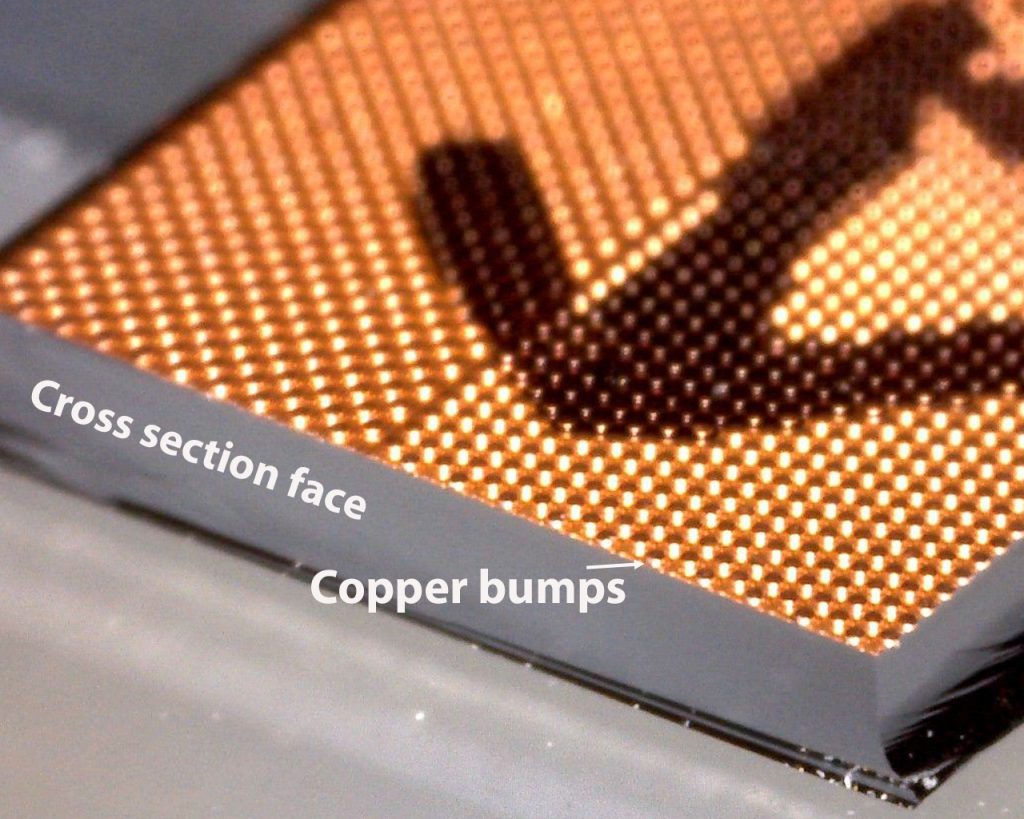
The LatticeAx was a key component of the sample preparation workflow for preparing copper C4 bumps for examination in the SEM. The following two-step process was used to prepare cross sections:
- Step 1: The LatticeAx cleaver was used to accurately and cleanly cleave the sample, making a cross-section close to and parallel to a specific row of copper bumps.
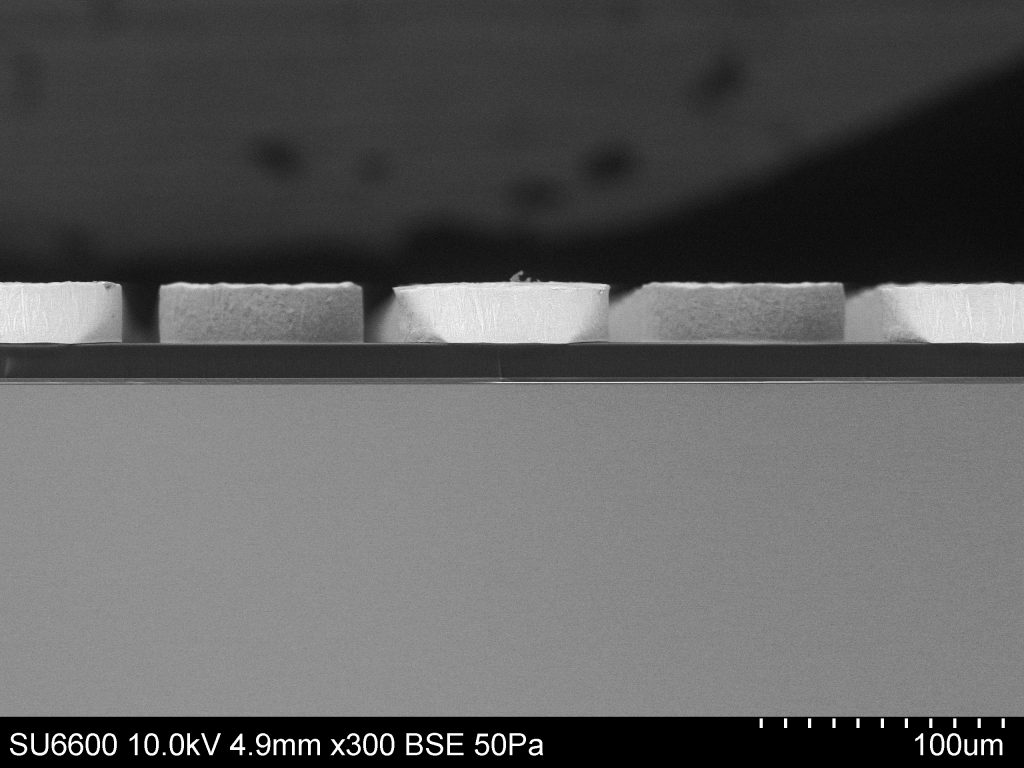
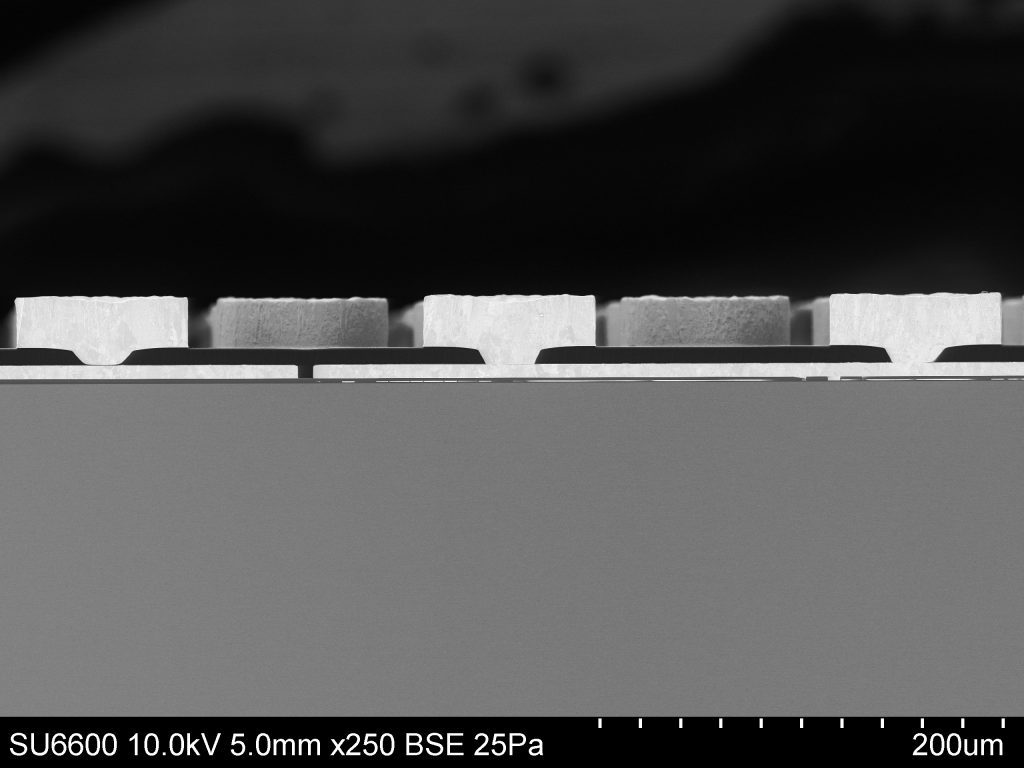
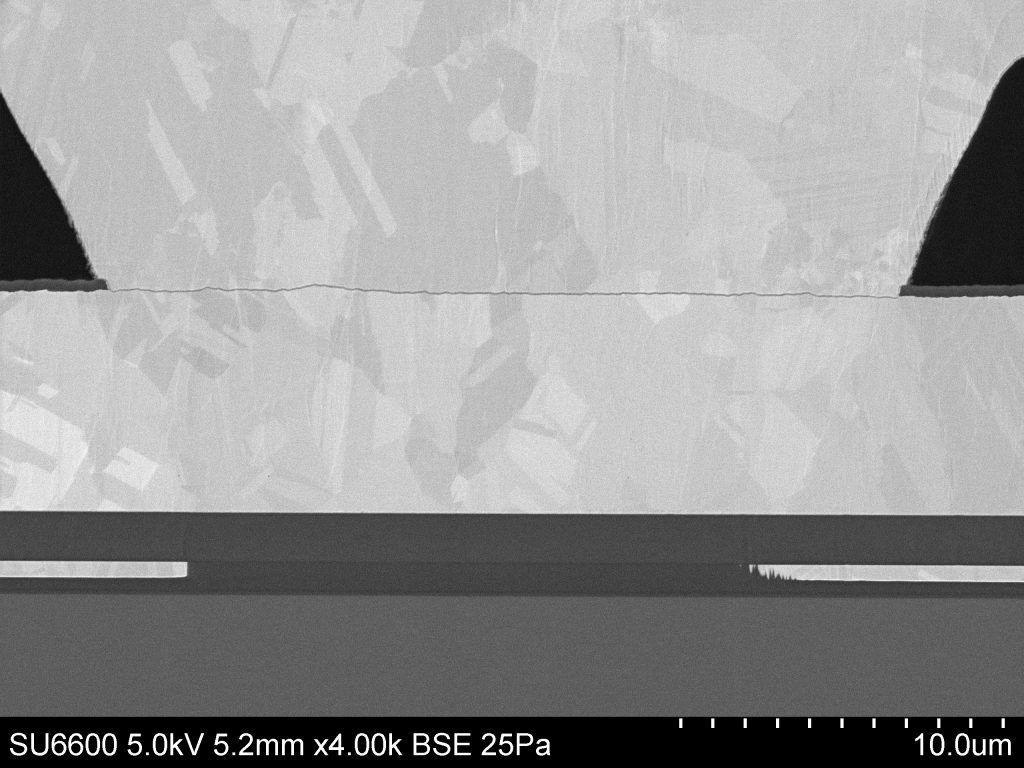
- Step 2: A broad, argon, ion-beam instrument, the Hitachi IM4000, was used to prepare the final imaging surface. No further preparation was performed.
The copper bumps had a diameter of 85 μm and were cleaved 30 μm from the center of a bump. The time to cleave was 5 minutes. In step 2, a broad, argon, ion-beam instrument, the Hitachi IM4000, was used to prepare the final imaging surface. The sample was mounted topside down on a sample block to perform backside milling. Backside milling was used to prevent artifacts of ion beam milling that can occur as a result of sample topography. By cleaving close to the center of the copper bumps, the time on the ion mill was minimized. No further preparation was performed.
